Today’s blogpost is from Gareth Gunn, master rigger of the Julie Burgess:
I have been repairing and making wooden blocks for a few years now for Julie Burgess as well as my own reproduction 18th century blocks, ancillary to this is the furnishing of the odd timber cleat. The construction of timber cleats was part of the traditional trade of the block maker.
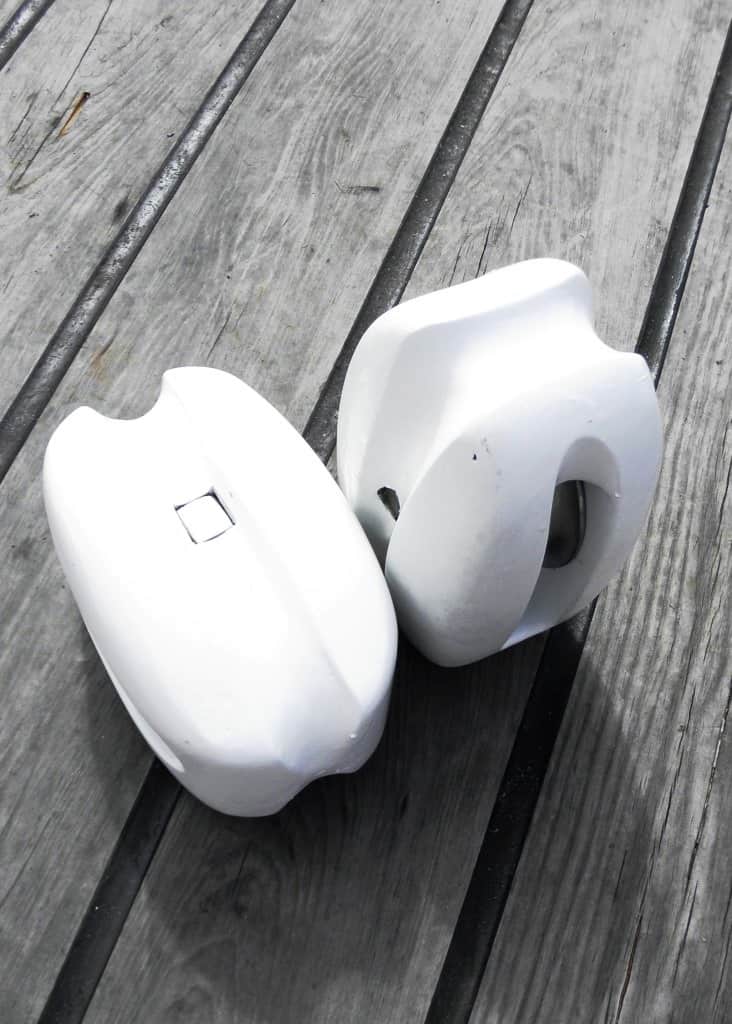
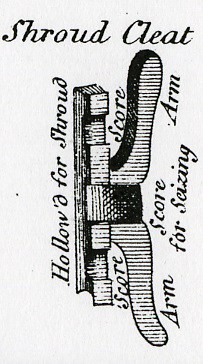
Along with historical information on blocks, works by 18th century writers such as Darcy Lever and David Steel give ample information on making cleats. The main consideration are the proportions, Steel gives these as: “they are…seven times the thickness in length. The arms are each one-third of the length, and made round; the middle, between the two arms, is left square twice the thickness in breadth, through which it is bolted or fastened; the back is curved in length that the arms may rise from the inside straight.” Outside of this there would have been tremendous variation amongst block makers in their preference for shape. Compared to what we are used to, timber blocks would have been provided to riggers in relatively crude form bearing in mind the lack of power tools. Depending on the requirement of the ship they were going to, they were fitted as is, or further refined by shaping and sanding smooth. This often varied to where fitted aboard with those about the quarterdeck given extra finishing.

Noting aboard Julie Burgess that the lighter lines such as flag halyards do not have a ‘home’, I have utilised some of my forced time not spent out and about, making up a set of shroud cleats for the vessel.
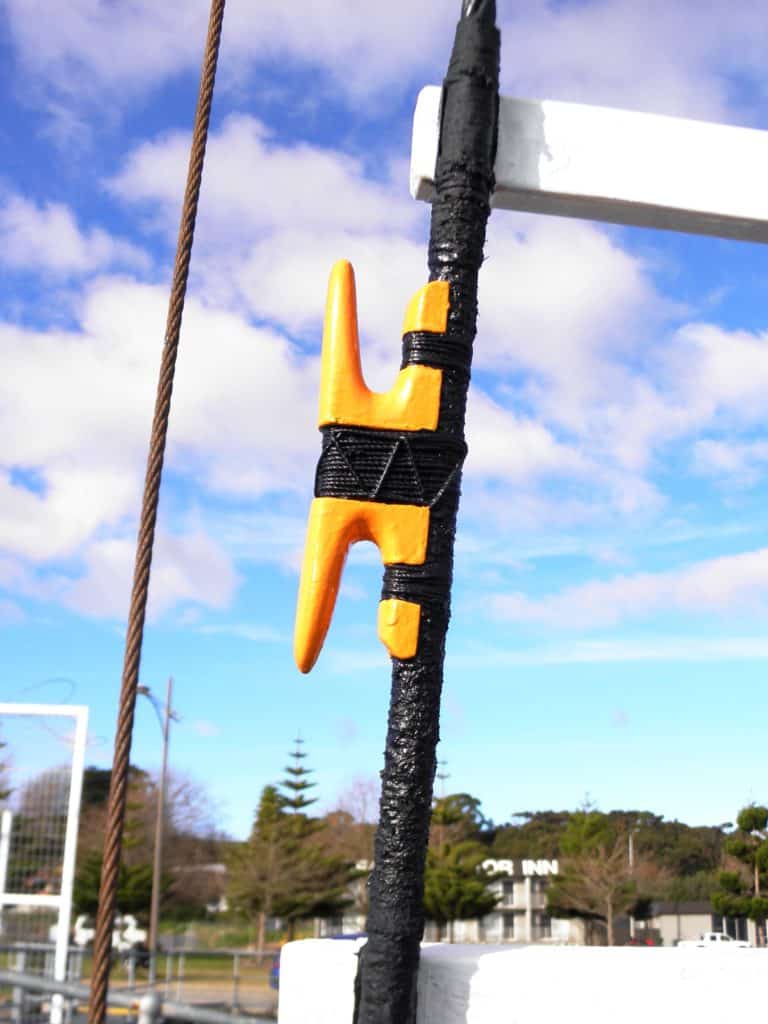
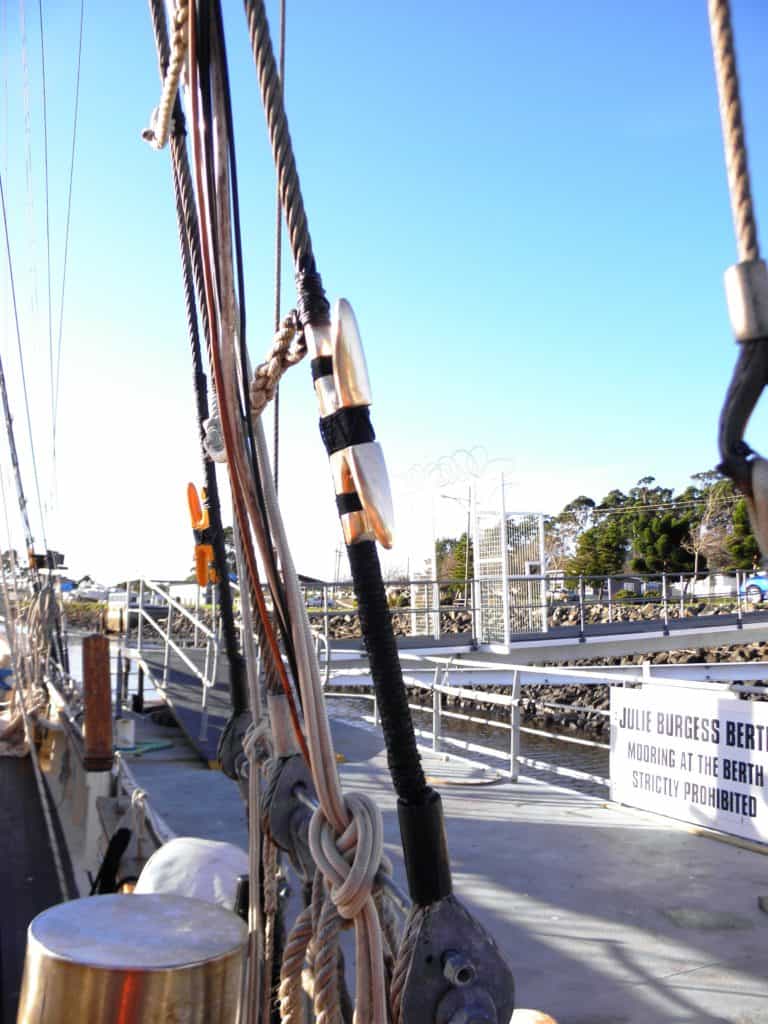
These are seized vertically to a vessel’s shrouds, hence the name. A ship’s shrouds are the fibre ropes or wire ropes that extend from near the mast head to the vessel’s deck. They support the mast in a transverse/athwartships direction. They generally are led from each side slightly forward of the base of the mast to a position further aft on each side. While not seen much these days, in square rigged ships with gear such as studding sails handled aloft, these would have seen much greater use. While oak was the preferred timber for cleats, I have a quantity of red gum which is ideal. The close interlocking grain and dense timber should provide ample strength. While the finishing of the seven cleats made has been by hand, I did use a wood router to profile cut the cleats using a plywood pattern. This speeds things up and ensures the basic dimensions are identical. Once the final shaping is finished the timber will be sealed with epoxy primer then they are ready to fit.
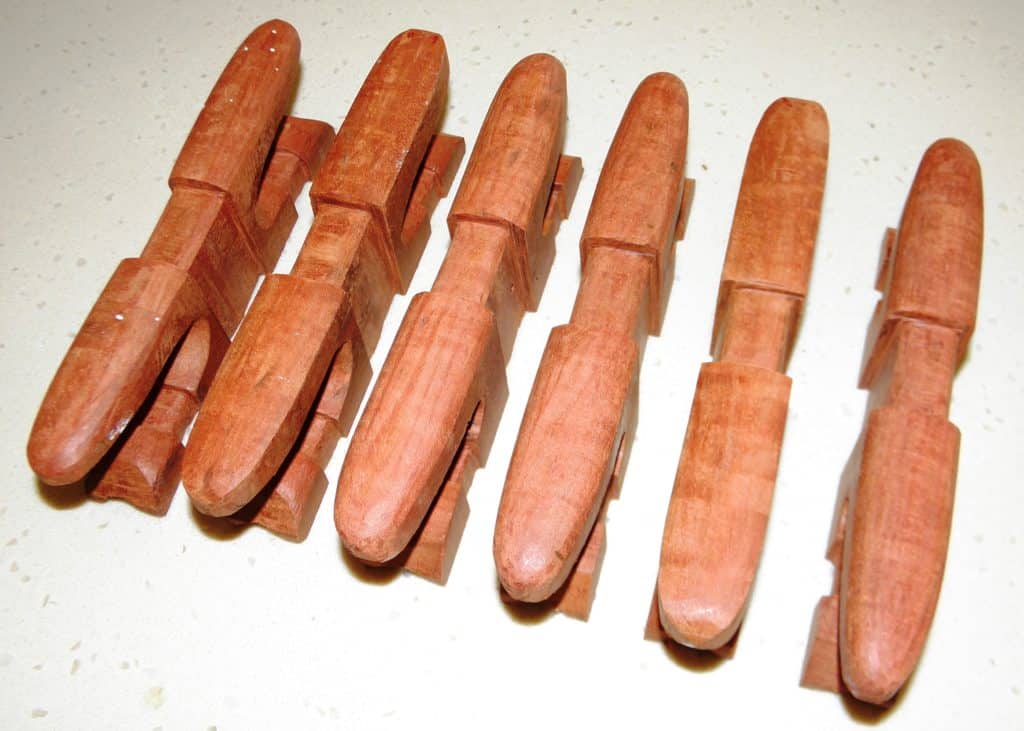
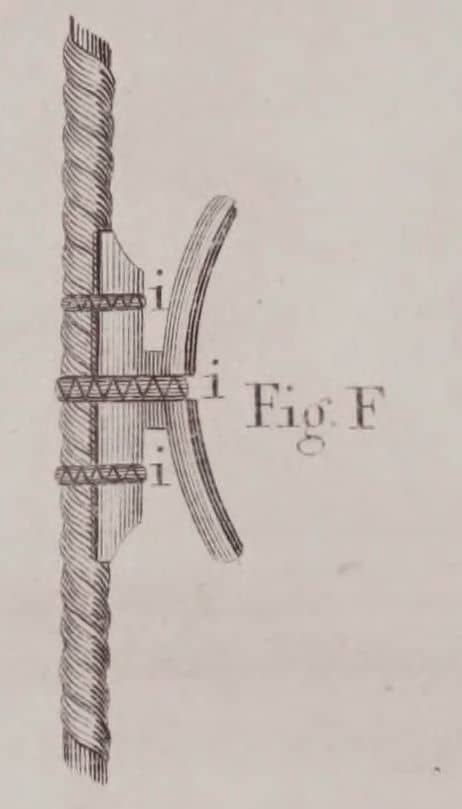
Of the cleats made, I further refined one as a pattern for casting in gunmetal. Due to the nature of metal over timber, the shape can be a lot slimmer. This will reduce weight and can be done due to metals greater strength. The pattern went to a foundry in Castlemaine with a number delivered in June. To fit these to a vessel’s rigging, the shroud or stay must first be parcelled and served over in the immediate area. This prevents rot or corrosion under the cleat, the traditional preservative being pine tar. This treatment is especially important if using gunmetal/bronze cleats to prevent loss of galvanised finish and corrosion of wire rope. The parcelling and serving also gives the cleat ‘grip’ on the shroud and prevents it sliding up or down. While tared marline was used for the three seizings about the cleat, I will likely use tarred nylon which will not rot and is much stronger.
To start the seizings, one of the holes in the cleat for fastening the initial pattern is drilled through and the marline secured with a stopper knot through this. After the requisite turns have gone around the cleat the end is secured with a hitch & tucked. For extra security the end can also be ‘snaked’ which provides a decorative finish as well. Finally the cleat, seizings and shroud are preserved with oil, tar. or paint. As a final refinement the seizings can be ‘picked out’ in a contrasting paint colour such as white.